Talk with Your Memories | Pieces Docs
Learn how to talk with your memories, filter searches, switch models, and work with responses in Conversational Search.
Conversational Search is the ability to talk with your memories through Agentic Chats. Powered by Agentic Long-Term Memory, the agent reasons across your artificial memory in multiple turns, following threads, cross-referencing context, and building toward complete answers instead of guessing in one shot.
Ask specific questions, search through your memories, and filter by apps or time ranges to customize which memories you're talking with. The agent can search your memories, the web, your calendar, local files, and browser history to build complete answers.

Full Conversational Search interface on homepage showing suggested chats, recent chats, chat input, model selector, and bottom toolbar
Talking with Your Memories
Have conversations with your captured workflow context. Ask specific questions about your past work, decisions, or activities.
Suggested Chats
Personalized chat suggestions appear on the homepage under Suggested Chats for You, generated from your recent workflow activity. Click any suggestion to instantly start that conversation. Responses include Related Timeline Events cards showing which memories were used as sources.
To regenerate the list with new prompts based on your latest activity, click the Refresh suggestions button (the circular refresh icon) to the right of the Suggested Chats grid.

Clicking a suggested chat, showing the complete flow from click to response with Related Timeline Events cards
Resume Recent Chats
Continue where you left off with your most recent conversations.
To browse the full chat history beyond the most recent two cards, click the Reveal previous chats in timeline button (the panel icon) on the right side of the Resume Recent Chats row. This opens your chat history in the Timeline, where every prior conversation is searchable and resumable.
Asking Your Own Questions
Type your own questions to have conversations with your memories about specific topics or moments.
Example questions:
- "Why did we choose PostgreSQL over MySQL for the authentication project?"
- "What was the blocker I encountered last Tuesday afternoon?"
- "Find that React performance article I read last month"
- "What did Sarah and I discuss about the API redesign in Teams?"
- "Show me the code changes I made related to WebSocket connections"

Start New Chat button and input field with example question typed
Starting Fresh Chats
Use Start New Chat when you want to discuss a completely different topic. Starting a new chat ensures better results when switching topics since Conversational Search uses relevant memory context across the entire conversation.
Adding Files and Folders as Context
Attach local files or folders to give Conversational Search additional context beyond your LTM memories.
Scoping a chat to one summary or event
To focus the assistant on one specific memory (for example a generated summary), open that item in Pieces Timeline, open the three-dots menu (⋮) on the event, and choose Chat. See Chat from a summary. For a broader slice of memories, use the Filter By... menu below to scope by Apps, Time, or Modality.
Filtering Your Searches
Filter which memories are used when answering your questions.

Filter Results By menu showing Apps, Time, and Modality filter options
Filter by Apps

Filter by Apps submenu showing available applications to include in your search
Filter by Time
Modality
Restrict searches to specific types of captured context—the method by which a memory was formed. Hover over Modality to see the available types:

Filter by Modality submenu showing Vision, Clipboard, Audio, and Google Calendar options
- Vision — What you’ve seen (screen context captured by LTM).
- Clipboard — What you’ve copied and pasted.
- Audio — What you’ve said and heard.
- Google Calendar — Events and meeting context from connected calendars.
Click Manage Connections at the bottom of the Modality panel to enable, disable, or authorize integrations.
Combining Filters
Combine Apps, Time, and Modality filters for precise queries—for example, "Chrome browsing from yesterday afternoon," or "anything I copied from Slack last week," or "meetings on my Google Calendar this month."
Working with Responses
Ask Follow-Up About Selected Text
Highlight text from a response to ask follow-up questions about it.
Response Toolbar Actions
All response actions are available in the toolbar below each response:
Model & time: A chip shows which model produced the answer and how long ago the response was generated.
Copy: Click the
clipboard iconto copy the entire response to your clipboardExport: Click the
export iconto download responses as PDF (for sharing/printing), Markdown (for editing), or Plain TextRegenerate: Click the
regenerate icon(circular arrow) to re-run the response with the same model or switch to a different one for comparisonConvert to Timeline Event: Click the
paper/document iconto save important responses—they'll appear in the memories sidebar for later referenceUse as Context: Click the
three-dot menu(⋮) and select "Use as Context" to add the response as context for follow-up questions

Response toolbar showing Copy, Export, Regenerate, Convert to Timeline Event, and More menu buttons labeled
Related Timeline Events
Cards appear below responses showing which source Timeline Events were used to generate the answer. Click any card to view the full Timeline Event details and verify where information came from.

Response with Related Timeline Events cards below showing memory titles and timestamps
Model Selection
Browse and switch models directly from chat, without navigating to Settings. The model picker shows inline descriptions and capabilities so you can choose the right model for your task.
| Mode | Speed | Quality | Best For |
|---|---|---|---|
| Fast | Fastest | Good | Quick questions, simple lookups, code completion |
| Balanced | Moderate | Better | General tasks, summaries, explanations |
| Extra Thinking | Slower | Best | Complex reasoning, debugging, multi-step analysis |
Your chat history stays intact when you switch models. New messages use the selected model while previous responses remain unchanged. Every family and mode is available on all plans.
For detailed model configuration, see Choose a Model.
Reset a conversation
When you need a clean slate, use Chat Options on an active thread to reset the conversation so context and messages start fresh for that chat.

Chat appearance and defaults
In the LLM runtime area, open the Settings gear to set a chat accent color and choose whether LTM context is on by default for new chats.

You can also use cmd+shift+t (macOS) or ctrl+shift+t (Windows/Linux) to toggle the Desktop App Dark/Bright theme.
Asking Effective Questions
The more specific your questions, the better Conversational Search can find relevant memories and provide accurate answers.
Use Specific Keywords
Include unique keywords related to what you're looking for—project names, ticket numbers, package names, or specific topics.
Good: "What is the status of project Aurora?"
Bad: "What is the status of my project?"
Include Time Ranges
Specify when something happened to narrow down results. Conversational Search stores up to 9 months of memories.
Examples:
- "What decision did we make about the database schema last week?"
- "What were the plans I received in December?"
- "What was I debugging yesterday afternoon?"
Mention Source Applications
Reference specific apps to separate similar content across different sources.
Example: "What did Sarah and I discuss in Teams about the deployment?"
This separates Teams conversations from emails or document comments.
Combine Techniques
Mix keywords, time ranges, and applications for the most accurate results.
Example: "What is the URL for the Project Aurora document I discussed in Teams with Sarah last Thursday?"
This combines the keyword "Project Aurora," the application "Teams," the person "Sarah," and the time "last Thursday" to narrow down results precisely.
Use Filters Instead of Prompts
If you know the exact source app, time range, or type of memory you're looking for, use the Filter By... menu to scope by Apps, Time, or Modality instead of describing them in your prompt. Filters are more accurate than natural language time expressions.
LTM Context Toggle
Control whether Conversational Search includes Long-Term Memory context in your conversations. When enabled, your chats automatically draw from up to 9 months of captured workflow context.
Enabling or Disabling LTM Context

User profile menu showing LTM-2.7 hover menu with pause and turn off options
Viewing the Relevant Summaries Sidebar
After receiving a response, see exactly which Timeline Events were used to generate it.
Managing Your Chat History
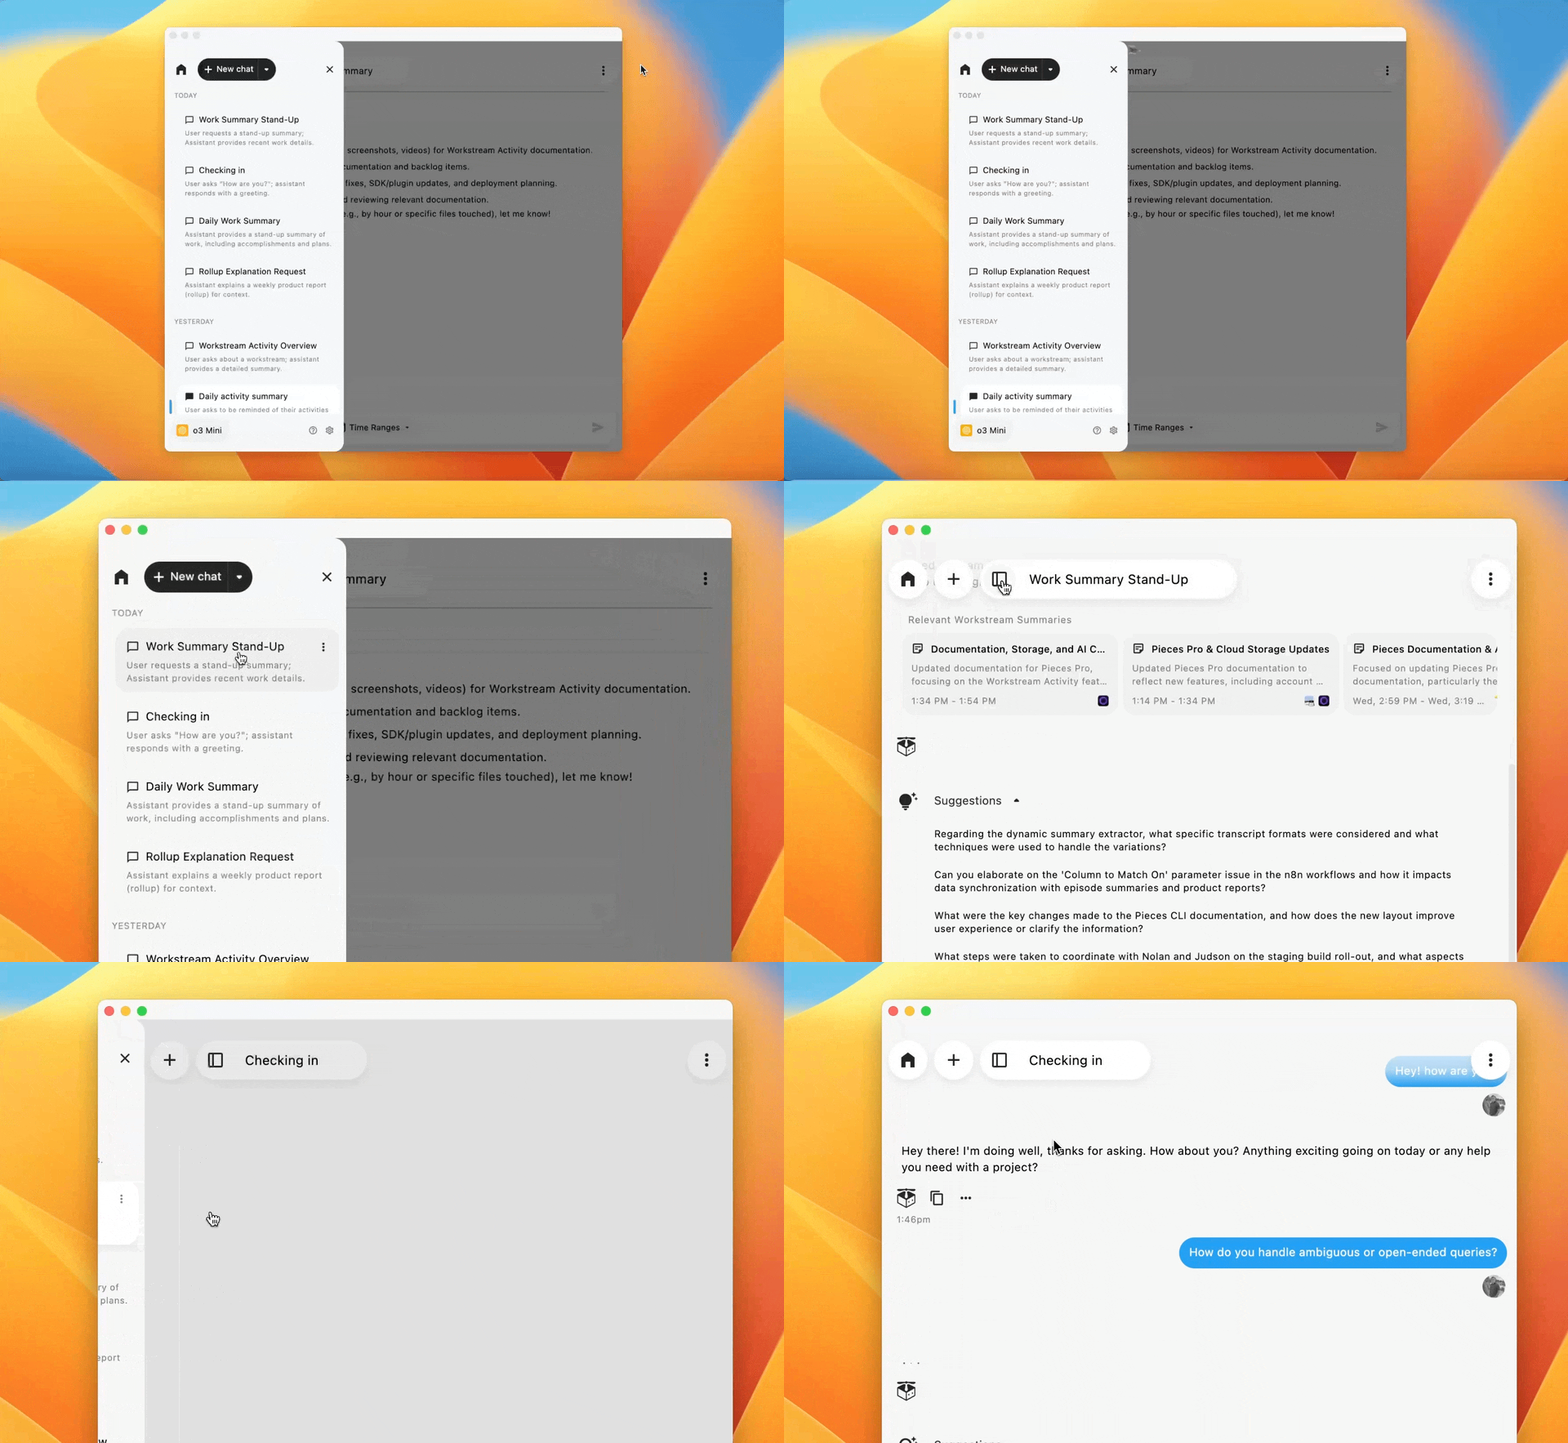
All conversations automatically save to the memories sidebar, listed chronologically with other workflow activities. Click any saved chat to reopen it with full history and preserved filter settings. Use Focus Mode (the control at the top of the sidebar) to collapse the sidebar when you want to concentrate on the active thread.
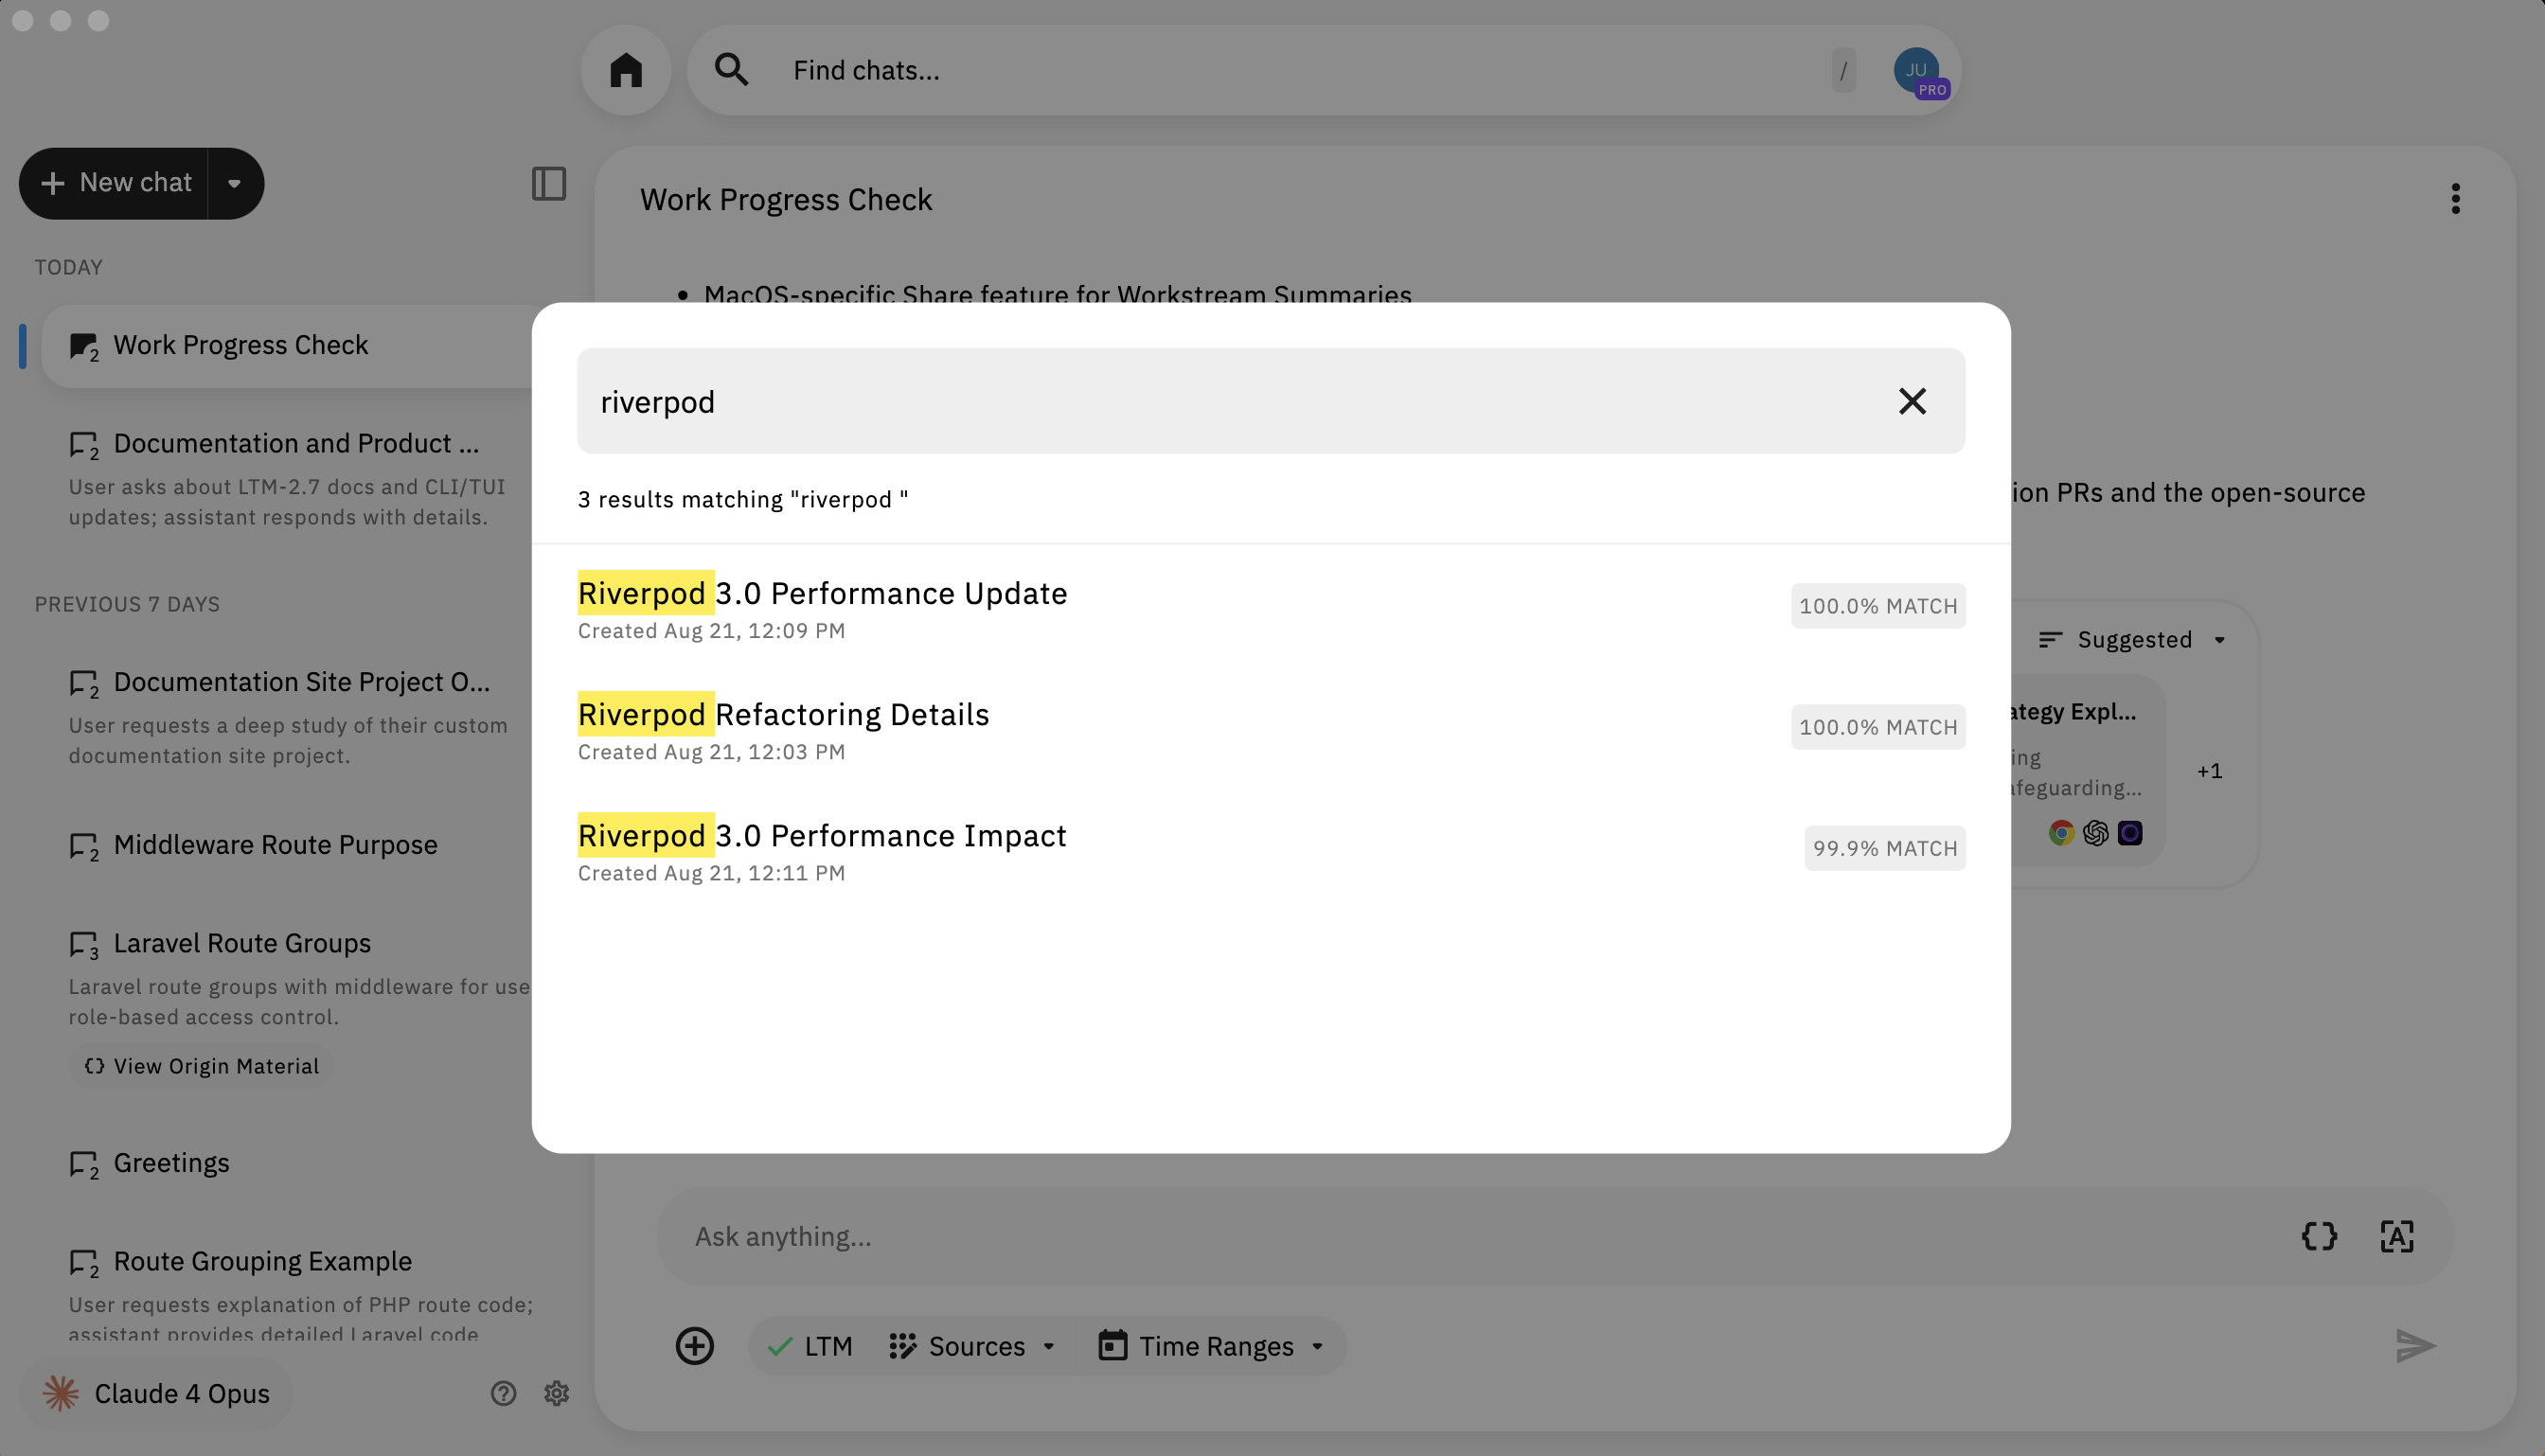
Find chats
Click the search field labeled Find chats… at the top of the Conversational Search view to open a modal of recent threads. Each row can show a relevance percentage (or an EXACT MATCH label). Type a query and press Enter / Return to run the search; matching text is highlighted in the results.

Chat Input & Bottom Toolbar
The chat input area includes a text field where you type your questions, along with a toolbar below it with the following controls (left to right):
+(Add Context) — Attach local files or folders to the conversation. You can also drag and drop files directly into the input area.Filter By...— Open the filter menu to scope by Apps, Time, or Modality.- Model selector — Shows the active model (e.g.,
Claude · Fast). Click to switch between model families and modes. - Reflection Mode (lotus icon) — Toggle the agent’s ability to reflect on its own reasoning and self-correct in real time. See Reflection Mode.
Send— Send your message. You can also pressEnter.
To scope the whole chat to one captured summary or event, use Chat on that item’s three-dots menu in Timeline. See Chat from a summary and Scoping a chat from Timeline.
Queue Up Your Next Message
Type your next message while the agent is still responding. Queued messages send automatically when the current response finishes.
Chat options menu
On an active thread (after you have sent messages), open the ⋮ menu at the top of the chat to Pin Chat, Refresh if generation stalls, or Delete the conversation. These options do not appear on a blank new chat.
Token Usage per Conversation
Track how many tokens each conversation consumes. Every chat shows cumulative token usage broken down by input, output, reasoning, and cache. Both LLM calls and tool calls are counted, giving you full visibility into the true cost of agentic work.
Token tracking helps you:
- Manage API usage if you're on a metered plan or using BYOK
- Compare model efficiency by seeing which models use more tokens for similar tasks
- Understand agentic costs since multi-turn reasoning and tool calls add up
Reflection Mode
Reflection Mode enables the agent to reflect on its own reasoning and self-correct in real time. When enabled, the agent produces higher-quality responses by evaluating its logic as it generates answers, catching errors and refining its output before delivering it to you.
Reflection Mode is powered by the Agent Harness—the framework that lets the agent reason across multiple turns, cross-reference your context, and refine its output before responding.
Enabling Reflection Mode
Toggle Reflection Mode using the lotus icon in the bottom toolbar, next to the model selector. Hover over the icon to see the tooltip: "Enable Reflection Mode — Agent will reflect on its own reasoning and self-correct in real time."
When Reflection Mode is active, the agent automatically engages deeper research and analysis based on the complexity of your prompt—no manual activation required. Complex questions about your workflow history, multi-step investigations, and cross-app analysis all benefit from Reflection Mode.
Next Steps
Now that you know how to use Conversational Search, learn how to start context-specific conversations directly from your workflow memories.